I have been using a Pi as a headless downloader for a while now that just stores downloads on a USB drive. In future though it'll be writing to network storage so the server will need to be on at the same time as the Pi. Given the Pi is headless I don't care where it is as long as I can access it over a network. So I got to thinking how can I ensure the server and the Pi are on at the same time? Well, if I use the power supply from the server then that would work. But how am I going to mount it inside the case and power it. Well, a CD or DVD Drive has a power connector on it and all the mounting hardware so why not use that! I quick chat with the IT at work turned up an old 52x CD-ROM drive that nobody will ever use again and the project got started!
Step 1 - Pulling it apart
I got lucky with this drive as this was really easy. 4 screws undid the base plate which revealed a PCB. I disconnected the drive mechanism from this and removed the PCB. All I was left with was the mechanism which just unclipped from it's rubber mounts. What I decided to keep was the PCB and the case and toss the mechanism. The PCB is held in by the screws and has the power connector on it so it'll work nicely as a place to mount the Pi. Unfortunately I don't have photos of the dismantling.
Step 2 - Making way for the Pi
I had to think about what connections I wanted access to on the Pi and where to place them on the drive. In the end I decided that ethernet was key and it should be out the back of the drive so the front still looks stock. This has the added advantage of letting me use the USB ports until I get the server running. It also means the front of the drive is free for extra goodies that could be accessed through the drive door.
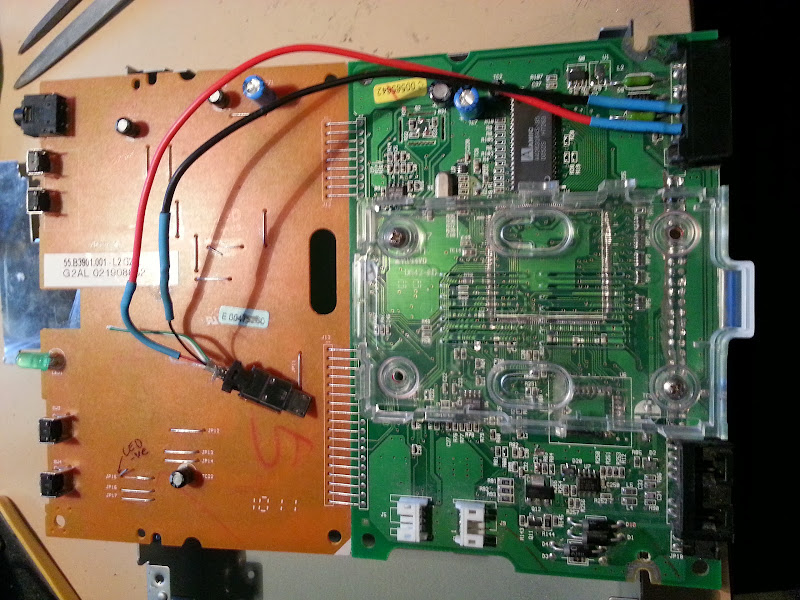
I hacked away any chips that were in the way and removed the IDE connector from the back of the drive making sure I didn't damage the power connector.

Step 3 - Mounting and Power
I reused the base of the clear case I already had, just drilled some holes and bolted it to the PCB. Then I carefully cut the power connector from the PCB and soldered wires to the 5V lines and spliced it into a micro usb connector so I could power the Pi.
I then hacked a 5V power adapter to power the drive. This is only until I get the server running.

Step 4 - Putting the Pi in place and Rear Panel Clearance
Now it was just a matter of putting the Pi in and seeing how much I needed to cut out of the rear panel.

Turned out there wasn't too much to remove and the cuts don't look too bad condering I used a hacksaw, a dremel and a file.

Step 5 - It Works!
From the front it looks like a normal CD-ROM Drive. In the future I'll see if I can't use those buttons and LED for something!

But the back reveals more.

Here it is working with a USB stick for now.

Here is a link to the Photo Gallery.